


Photoshop: Light Beam
Introduction:In this tutorial I am assuming that the reader, you, has intermediate photoshop skills and knows how to use the
photoshop tools and where they are. Therefore I will not spoon feed you. You should know how
to use the blur filters: Motion blur, Radial blur, and Gaussian Blur very comfortably.
This tutorial is not very hard at all and you should be able to make something like my beam if
you follow the steps I took. Please remember that as you get better with photoshop its more and
more up to you to decide what looks better or worse. The steps are not set in concrete! You may
get a better beam by doing something I didnt.
Time to complete: 20-30min
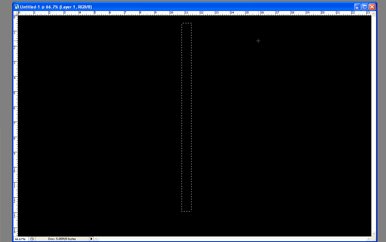
Step: 0
Open a new document. Make it big enough. I
used 2000x1500. Fill the background with black.
Step: 1
We are now going to make the main body of
our beam. Make a new layer and Select a rectangle about 20px wide and 1000px tall.
Step: 2
Fill the rectangle with white on
the new layer. Duplicate the layer and use Gaussian blur on it to give the original rectangle a
little bit of a glow. Merge the layers.
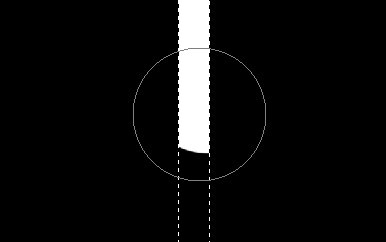
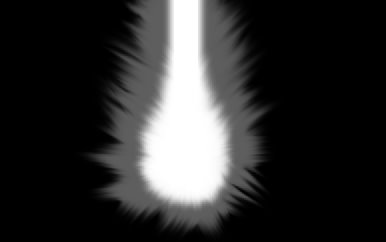
Step: 3
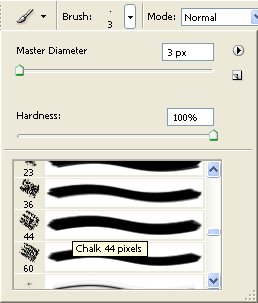
Using the smudge tool with a
"chalk" brush
and a 14% strength make a water droplet shape out of the bottom of our rectangle.
Step: 4
Duplicate the layer. Increase the
strength of the smudge tool to about 30% and make the droplet bigger.
Set the opacity of the new layer down to about 50%.
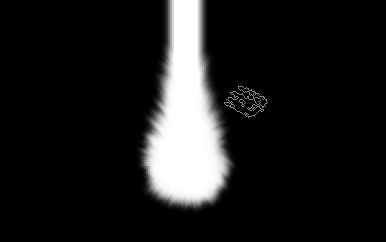
Step: 5
Use the Light
Rays tutorial to make a whole bunch of light rays around our beam. Each on its own layer of
course.
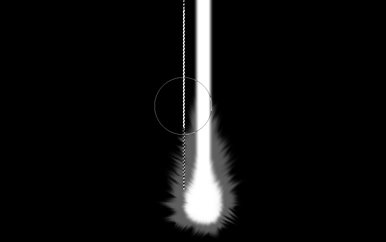
Step: 6
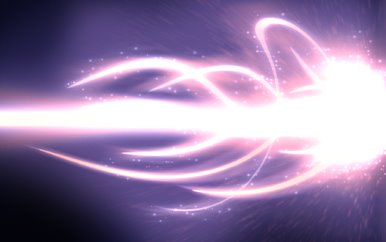
If some of the
light rays dont fit in well you can use the liquify tool to bend them a little. You should now have
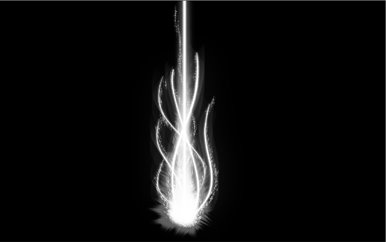
something like this.
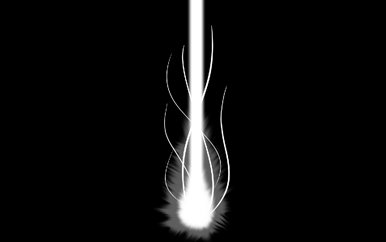
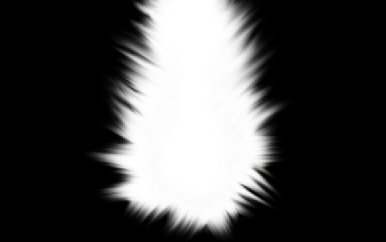
Step: 7
Merge all the Light Rays onto
one layer. Duplicate that layer a few times and add various blur effects. I used motion blur at 52
degrees and then on another copy of the light rays layer motion blur at -52 degrees. Then I
added a layer of Gaussian blur to make the rays look like they are glowing.
Step: 8
We are now going to add some
dust particles. Using the
Dust Particles tutorial make dust around the rays.
Step: 9
Duplicate the dust layer a few times and add
various blur settings. I used radial blur to give the beam the effect that it was moving really fast.
And some Gaussian blur to give the dust a glow.

Step: 10
I didnt like the original beam
body. I used a layer mask and a fuzzy brush to get rid of the stem and added a thinner one.
Step: 11
Merge
everything.
Step: 12
Using the Color
Balance tool add color to the beam.
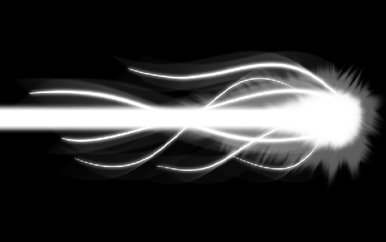
That concludes this tutorial.
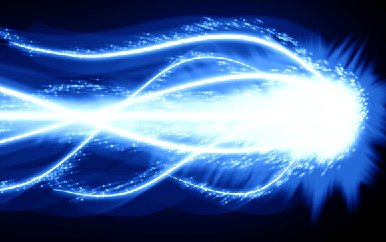
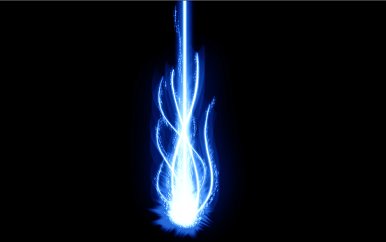
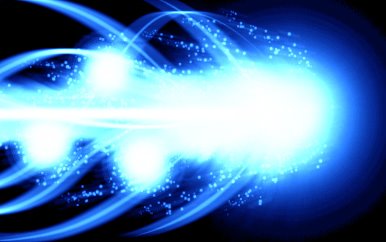
Using slightly different settings I made these
beams as well:
Source :
http://photoncubetutorials.blogspot.com/2006/04/photoshop-light-beam.html


0 comments:
Post a Comment